List View
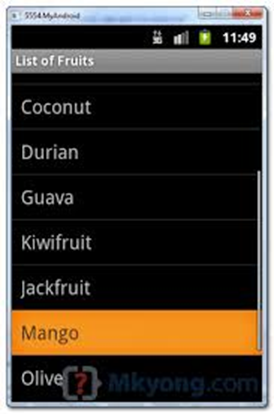
A List View allows you to create a list of objects which the user can choose from. It may contain any amount of objects as it is scrollable. It requires an adapter that adapts data into the list. The adapter we will be using is an ArrayAdapter, which can translate strings from an array or List into TextView entries into a ListView. This will also update the ListView when items are added or removed from the array.
Step 1: Add a new ListView to your layout, and make a field in your java code for it:
|
ListView list;
@Override protected void onCreate(Bundle savedInstanceState) { super.onCreate(savedInstanceState); setContentView(R.layout.activity_main);
list = (ListView) findViewById(R.id.list); { |
Step 2: Create the layout that your items will be contained in. In your /res/layout folder, create a new xml file. You can use whatever layout you want, but since we are using an ArrayAdapter, it must contain a TextView. In my program, I will also have an ImageButton that can delete each entry.
|
<LinearLayout xmlns:android="http://schemas.android.com/apk/res/android" android:layout_width="fill_parent" android:layout_height="fill_parent" android:descendantFocusability="blocksDescendants" android:orientation="horizontal" >
<TextView android:id="@+id/toDoItem" android:layout_width="wrap_content" android:layout_height="wrap_content" android:textSize="20dp" android:paddingTop="10dp" android:clickable="false" android:enabled="false" android:editable="false" android:textColor="#FF000000" android:layout_marginLeft="8dp" android:layout_marginRight="8dp" />
<ImageButton android:layout_width="wrap_content" android:layout_height="wrap_content" android:id="@+id/imageButton" android:paddingRight="5dp" android:src="@drawable/x" android:paddingLeft="5dp" android:onClick="removeButton" android:visibility="invisible"/>
</LinearLayout> |
Be sure to include android:descendantFocusability="blocksDescendants" because it will allow us to change what happens when items are clicked on.
If you do not require a layout and instead only want text in your list, you can delete the layout and have the TextView as your outermost component in this file.
Step 3: Add an ArrayAdapter to this list. You will also need a List or array for the adapter to use. The constructor I am using requires the file that we made (mylist) as well as the TextView that it will use to put the strings in (toDoItem). If your resource file (mylist) does not contain a layout and instead only a TextView, you do not need to include the reference to the TextView.
|
ArrayList<String> toDoList = new ArrayList<String>(); ArrayAdapter<String> adapter; ListView list;
@Override protected void onCreate(Bundle savedInstanceState) { super.onCreate(savedInstanceState); setContentView(R.layout.activity_main);
list = (ListView) findViewById(R.id.list);
adapter = new ArrayAdapter<String>(this,R.layout.mylist,R.id.toDoItem, toDoList); list.setAdapter(adapter); |
To add or remove things to your ListView, use adapter.add(Object o) and adapter.remove(Object o).
Step 4: Adding touch capability to your ListView: To add touch capability, we must set the OnItemClickListener of the list. We will be using the default class, but we need to override one function, onItemClick(), so adding this code to your onCreate() function will set the listener and override the function so we can rewrite it:
|
list.setOnItemClickListener( new AdapterView.OnItemClickListener() { @Override public void onItemClick(AdapterView<?> arg0, View view, int position, long id) { //put code here } } ); |
This function gives the Layout/TextView (from the template in mylist.xml) that you clicked on (View view), the position in the list that it is in, and the id of it. This information allows you to operate on whichever item you clicked on.
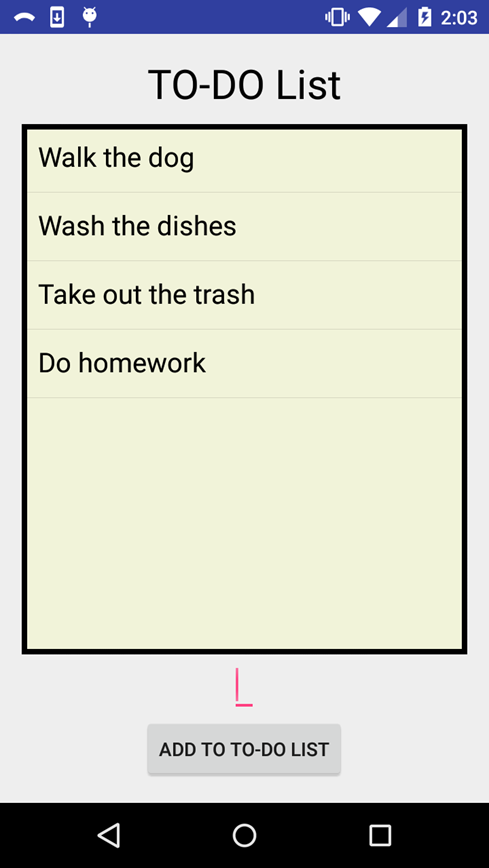
Challenge: Using this tutorial as well as T05 - Saving State, create a to do list keeper where a user can type in items that they need to do, which will be displayed in a ListView, as well as delete the items they have accomplished. It should save the items in a txt file when the user closes the program, so when it is opened again, the items can be added to the ListView.